

The original picture is from Mayco's project section on their website. It looked like it could be done using pinch pots - so we gave it a try!
It took us two(45min) class periods to create the sculpture. The first class we used two pinch pots to create the birdbath. Students added designs into the clay using various tools, shells, and found objects.


After Spring Break our pots had been bisque fired and were ready to glaze! Students used a variety of colors of glazes on their clay pieces. We use low-fire clay and glazes at the elementary level in our district.
We dropped a couple of glass marble pieces into the middle of the piece after the glaze was applied. I had seen this done on other art teacher's blogs, but had never tried it. The students were excited to learn that they would be the first classes to try this. "You mean you've never done this before Mrs. G? How do you know it will work?" I just shrugged my shoulders and said - "I guess we will find out!"
Here they are ready to go in the kiln for the glaze firing -

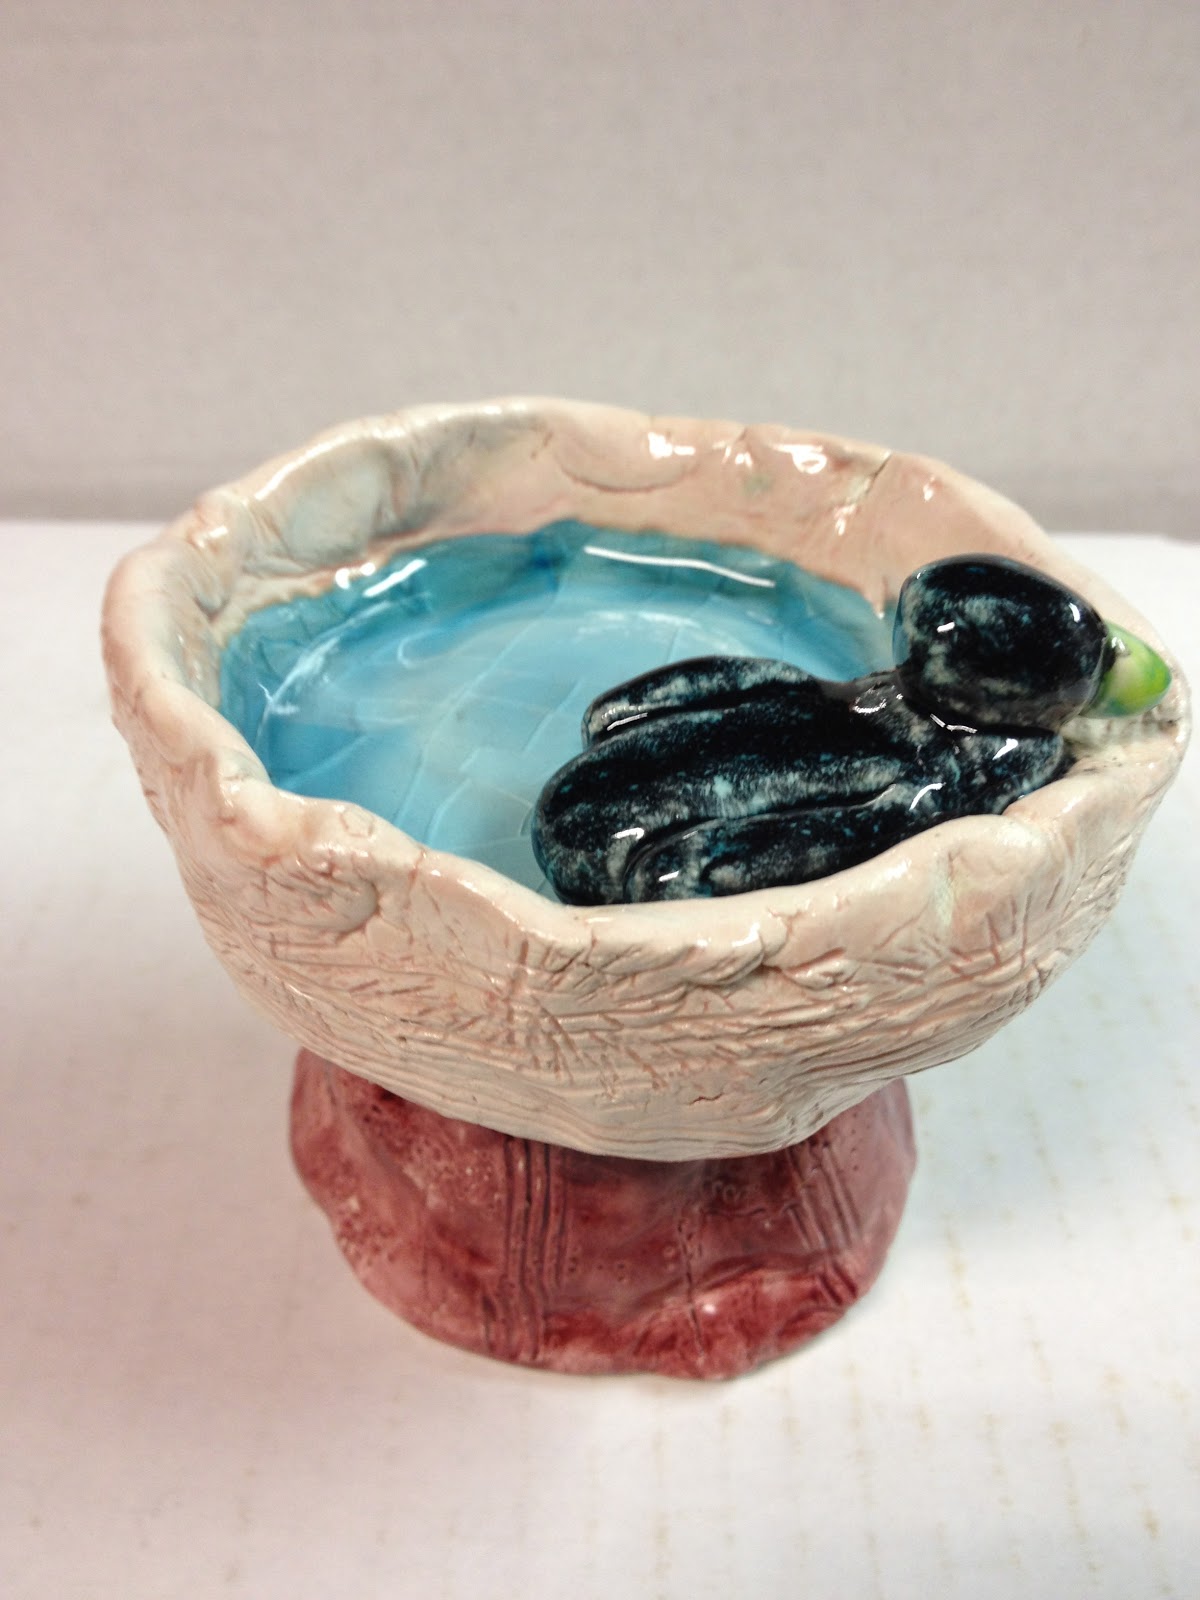
I couldn't wait to take these out of the kiln! Here are some of the finished pieces. I did notice some of the birdbaths with wider tops needed an extra marble or two, and the color choice of glaze did affect how the blue marbles looked when melted. So I will use this knowledge to guide my two other 4th grade classes who are about to glaze theirs.


Congratulations! These sculptures are magnificent. The glaze gives a great finish. Smart Class Consultare blog to see if I can cheer like you. I have many doubts, the oven is special for the clay?
ReplyDeleteA hug and see you soon.
What a neat idea! Did you fire the kiln to Cone 05?
ReplyDelete~Jessica (missyoungsartroom.blogspot.com)
Yes Jessica - they were glazed fired to Cone 05.
DeleteThese combine so many great techniques and look so cool!
ReplyDeleteI just discovered the glass marble thing this year and love it. Magic:)
I just love seeing your projects... Your students are very lucky to have you as their teacher!
ReplyDeleteKeep up the great work!! And thank you for your inspiration!!
Debra in Wisconsin!
Thank you very much for your kind words Debra!
DeleteSuper cute - well done! Can't wait to try the glass marble thing!
ReplyDeleteThanks Anne! 2 of the classes took their sculptures home today and were so excited. Let me know how things come out when you try adding the marbles in one of your projects!
DeleteThese appear to be the little flattened glass pebbles you would find in a floral department. Did you try any regular round toy type marbles? Would they work the same?
ReplyDeleteYes these were those flat glass pebbles -but regular round glass marbles will melt just the same! These were just easier to get a large quantity of the same color - less cost also.
DeleteWhat gorgeous birdbaths!
ReplyDeleteLove these sweet sculptures. Do you know if this would work if firing to cone 6?
ReplyDeleteFrom what I've read others have tried at higher temps I believe it would. Of course I would experiment before trying with students. I'm wondering if the higher temp would take some of the color out of the glass. Let us all know if you experiment!
DeleteI just did this project, and added the beads. I fired at cone 06 and it was a disaster! My stilts I had in the kiln for another grade's projects actually melted to the shelves. The color on the bird baths came out dull and gray and unattractive. I'm really not sure what else I did wrong. I fired at medium and at 06. :( so sad! I had such high hopes!
DeleteThat sounds like your fired at cone 6 instead of 06 or your kiln malfunctioned. It has to have been way too hot. I have seen this result when a colleague of mine did a glaze firing and accidentally hit 6 instead of 06. I hit review on the kiln control panel and it showed that it fired at 6. Check your kiln. Run a test with some cones. This shouldn't have happened if it fired correctly.
Deletethis is a wonderful idea! good job trying it out!
ReplyDeleteawesome.
ReplyDeletegreat first try
ReplyDeletewhat colour did u use ?? really nice work
ReplyDeleteThe glass pebbles were blue.
DeleteTheresa ...I am impressed at the students artistic ability...Awesome! I have a question...If I were to use polymer clay that bakes in the regular kitchen oven and use the glass marbles...do you suppose they would melt? I do not have a kiln...ugh
ReplyDeleteI don't think so - but plastic pony beads would and may give the same look.
DeleteTwo questions- where did you buy the marbles? And if there was a hole in the bird bath (as my students' projects are often not perfect) would the glass melt and then go through the hole and go all over the kiln and make an impossible to clean up mess?
ReplyDeleteI've done this project with second graders without a pedestal which makes it an easy one class project. When I fired at 05, the glass crazed but only under the surface. It feels smooth on top. I may fire at 06 next time since my glaze is 05-06.
ReplyDeleteCone 05 or cone 5?
ReplyDelete05
DeleteWhat color glaze works best with the glass marbles?
DeleteFired mine (a test, thank goodness) at 06 and the glass bubbled... any tips?
ReplyDeleteThis comment has been removed by the author.
DeleteInterested in this answer, too! We had the same bubbling of glass. Perhaps the clay pieces weren't completely dry?
DeleteWould you be able to share what you learned about how glaze affects the color of the glass?
ReplyDeleteWell they sure look beautiful! I bet the kids had a great time.
ReplyDeleteDid your students paint the glaze on even under where the glass beads were going? Did you have any crack?
ReplyDelete