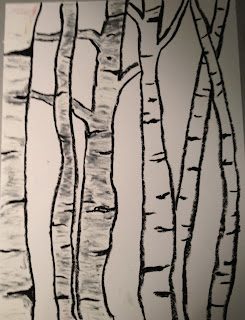
The students and I discussed the lines we saw in images of Birch trees. They compared the texture and color of Birch tree bark with that of other trees.
 The project started by drawing the birch tree trunks using black oil pastel. We talked about the use of overlapping to make some trees look like they were behind others. They colored in the trees with white oil pastel letting the black and white blend a bit into grey.
We had a discussion about how an artist can add interest and uniqueness to their artwork by changing things from how they look in "real life." I introduced the term "Artistic License" to them and told them they each had one to be creative with. I encouraged them to add other colors into the bark of their birch trees if they wish to do so. Many used different colors of oil pastels to blend into the white and black of their trees.
The last step in the project was to use primary colors of watercolor to paint in the background. We were reviewing how the primary colors mix to make secondary colors, so I encouraged them to mix them together as much as they wanted to.
This is one of my favorites! See more student works in our Artsonia gallery - http://www.artsonia.com/museum/gallery.asp?exhibit=561263


Birch trees always make an effective result, but these are quite stunning aren't they? I think it's the variation in the thickness, overlapping and slashes of color on the trunks. Really nice, I'll be borrowing this method! :)Elizabeth
ReplyDeleteThanks Elizabeth - I was very happy with the student results. You are welcome to use my PowerPoint presentation I created and used with my students. You can find it on my Art with Mrs. G! website -presentation page - ArtwithMrsG Presentations
DeleteThere is even a download button below the Scribd window to download the file.
I really like your technique, it's so much more naturalistic than the ones I've seen using masking tape. Really pretty!
ReplyDeleteThank you! I agree about the masking tape - although I've seen some really neat ones done that way too!
DeleteHow I wish I had been a student in your class!
DeleteVery cool lesson, I will definately try it with my students.
ReplyDeleteIn blending two or more than two colors are combined together by rubbing one another with the help of blending tools such as the kneaded eraser, brushes, tortilla and cotton swab.
ReplyDelete