Showing posts with label Clay. Show all posts

Saturday, April 21, 2012

Birdbath Sculptures with Melted Glass Water

I saw this idea posted on smART Class blog a year or so ago and thought it would be a great project for 4th graders.


The original picture is from Mayco's project section on their website. It looked like it could be done using pinch pots - so we gave it a try!


It took us two(45min) class periods to create the sculpture. The first class we used two pinch pots to create the birdbath. Students added designs into the clay using various tools, shells, and found objects. 
 The next class we finished any designs on our sculptures and added a bird and put them out on a table for us to admire and let dry. The reactions of the other students in and out of the Art room - Oooo's and Aww's mixed with some jealousy - created an air of excitement that made the two classes working on these even more anxious to finish them.


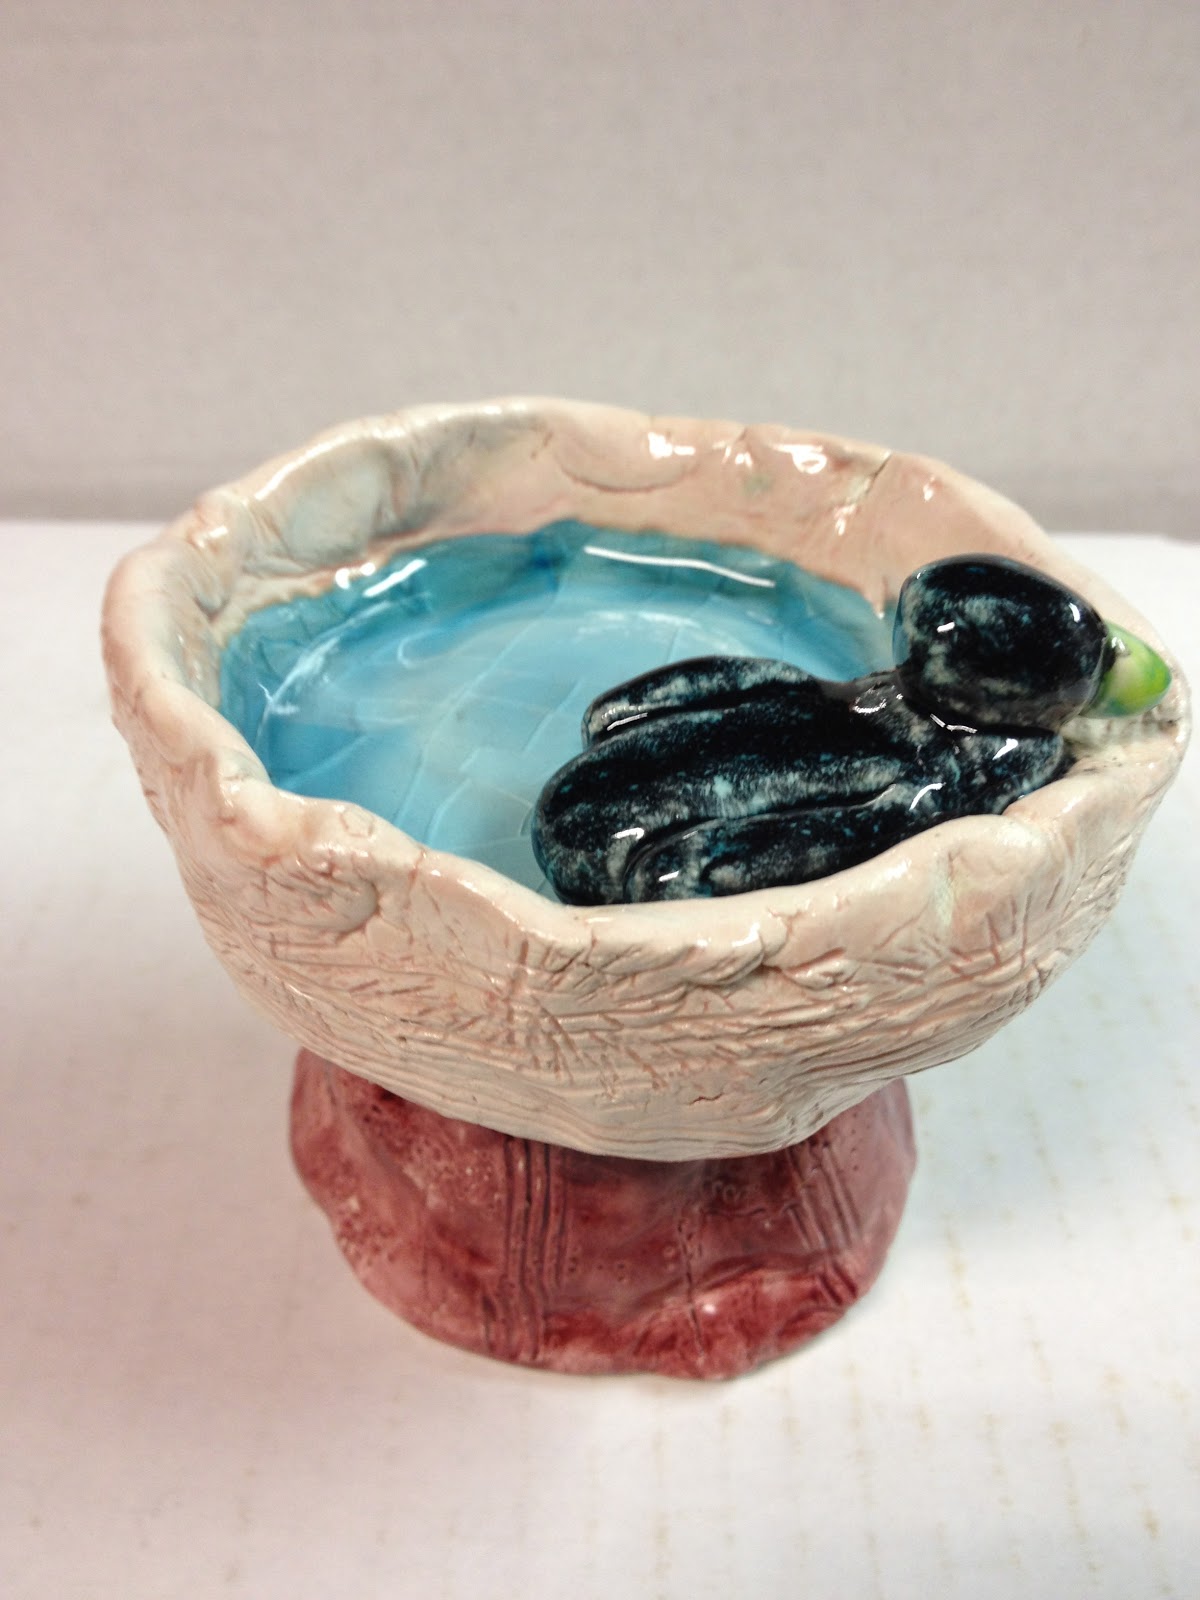
After Spring Break our pots had been bisque fired and were ready to glaze! Students used a variety of colors of glazes on their clay pieces. We use low-fire clay and glazes at the elementary level in our district.
We dropped a couple of glass marble pieces into the middle of the piece after the glaze was applied. I had seen this done on other art teacher's blogs, but had never tried it. The students were excited to learn that they would be the first classes to try this. "You mean you've never done this before Mrs. G? How do you know it will work?"  I just shrugged my shoulders and said - "I guess we will find out!"

Here they are ready to go in the kiln for the glaze firing - 


I couldn't wait to take these out of the kiln!  Here are some of the finished pieces. I did notice some of the birdbaths with wider tops needed an extra marble or two, and the color choice of glaze did affect how the blue marbles looked when melted. So I will use this knowledge to guide my two other 4th grade classes who are about to glaze theirs.


Wednesday, March 28, 2012

Clay Bird Bath Sculptures Part 1

4th Grade students have been working on a very fun clay project! 
Using skills learned in previous grades, they are putting together a bird bath sculpture.


The sculptures are created with two pinch pots - one for the base and one for the top. Designs were pressed or carved into the sculpture and then a small bird was added.
The clay pieces drying on the table created a bunch of ooo's and ahh's from the other students in the school!

Once these are bisque fired, we will glaze them and then put a blue marble or glass chip in them. Students are anxious for this!


Friday, February 3, 2012

One Clay Project - 3 Ways! Cantrell Inspired Clay Faces

Kimmy Cantrell Inspired Clay Faces - Finished 3 Ways - Which is the best method? 


Last quarter I was lucky to have a wonderful student teacher. As part of her practice teaching she created a project unit for 3rd grade dealing with shapes and colors. One of the projects was a clay project inspired by artist Kimmy Cantrell.  She came up with a great clay face project that combined shape and texture. We brainstormed different ways of finishing the pieces - using glazes or painting with acrylic.  Because I'm in three different buildings there were 5 classes that were going to be doing this project. She would be doing the project with the 3rd graders in two of my schools and because of the timing I would be doing it with the 3rd grade class in my third school after her time with me was done. We decided to experiment with how to finish the clay faces to see which was the better method. She used glazes in one school and acrylic paint coated with wax in the other school. I decided to use acrylic paint with the class I did - but had students base coat with black first.

I think there were great successes in all of the classes. The students enjoyed the project. They learned about asymmetrical design, texture, and a new artist all while having fun!

Here are the results of the three different methods....which do you prefer?

These pieces were finished using glazes - 


These pieces were finished using "earthy" colors of acrylic paint coated 
with some floor wax for shine - 


These pieces were finished with a base coat of black acrylic - when that dried students chose lots of different colors of acrylic to it. No wax coating seemed to be needed - 


Friday, December 23, 2011

1st Grade Clay Turtles with Habitats


1st grade students created a pinch pot clay turtle one art class. The next class - while the clay was drying and being fired- we discussed environments and habitats and drew a habitat for the turtle to be displayed on. The third class was spent glazing.

The habitats were done just using crayon or oil pastel.


One of my classes didn't have time to do the habitats because of missing a class. We may draw them before students take the turtles home.
This was a simple clay lesson to introduce these young artists to techniques to attach pieces of clay together and introduce the glazing process.

Saturday, September 10, 2011

Pinch Pot Faces with Growing Hair!

Make Face - Grow Hair!!
 I saw this tonight on Pinterest  and it reminded me of a project I did years ago that I need to do again! Be sure to visit Kathy Barbro's blog for info on her project along with lots of other great resources! 
 I like the flesh tone Kathy used on her planter. Years ago I did a similar project with 4th graders. We created pinch pots with faces. After they were complete we added potting soil and grass seed or perhaps chives - I don't remember which. They sat along the window sill and each week the students watched as their faces grew hair. It was a fun project that caused a lot of talk among the other students.

I think it's time to do it again!!

Here are a few of the finished faces -


Sunday, March 6, 2011

Did You Hear the Oven Beep? Our Cupcakes are Ready!!

The Completion of the Cupcake Unit! Oh...That was FUN!!

Fourth grade students and I had a fun time with this unit. After learning a little about the art of Wayne Thiebaud the students drew cupcakes. I have two fourth grade classes this year - one in each building. The make up of the two classes are quite different, as are the two schools. So I approached this unit knowing I would do some experimenting with the methods and how I planned the progress of the project. For the drawing part, one of my classes used oil pastels on white paper and one class used chalk pastels on black paper. I did this to see which drawing medium would work the best. I think the most successful was the chalk pastels on the black paper. Students were able to blend the colors faster and achieve success easier.


Another difference came with the timeline of the clay cupcakes. The one class has more students who need more one-on-one attention and more students in general. They were the first class I started the clay work with. I realized about 15 minutes into the 45 minute class that the cupcakes would not be completed all in one class, so I told the students to just work on the bottom part and then we placed them into plastic bags so we could finish them the next week. That same week when I began the clay cupcakes with the students in the other school, I was prepared with plastic bags in the event that this class would be the same in their progress. That was not the case with this class. They completed the entire clay cupcake with great success within the 45 minute period.

Here's a look at their cupcakes after they were bisque fired -

Here are some finished glazed clay cupcakes -